e-Prescribe
Overview of e-Prescribing
Patient Safety and Use of E-prescribing.
Patient safety can be improved through E-Prescribing by increasing prescription legibility, decreasing the time required to prescribe medications and dispense them to patients, and decreasing medication errors and adverse drug events.
The E-prescribing Process
1. Search for Patient
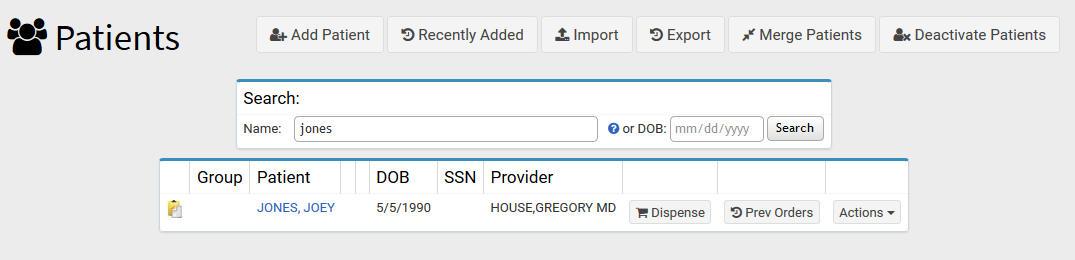
- The View Patients screen will show the newest 25 patients and provide options to search for existing patients. In the Patient listing the Dispense and Previous Orders options are now buttons and all other functions have been consolidated under an "Actions" area.
- You can search for patients by last name, last name first name or by date of birth.
2. Prescriptions Tab
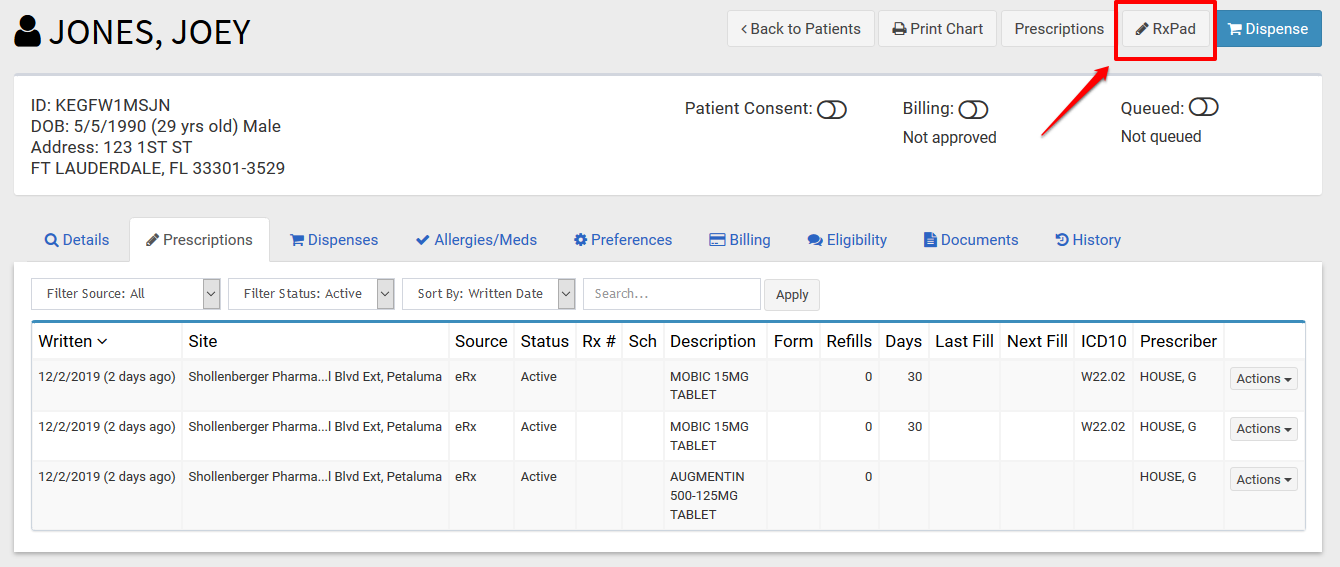
- Combined view of all patient's prescriptions including prescriptions dispensed in-house as well as any transferred prescriptions or prescriptions E-Prescribed to outside pharmacies.
- List can be filtered and sorted based on source of prescriptions, status, or user can use search box to see all prescriptions for a specific medication.
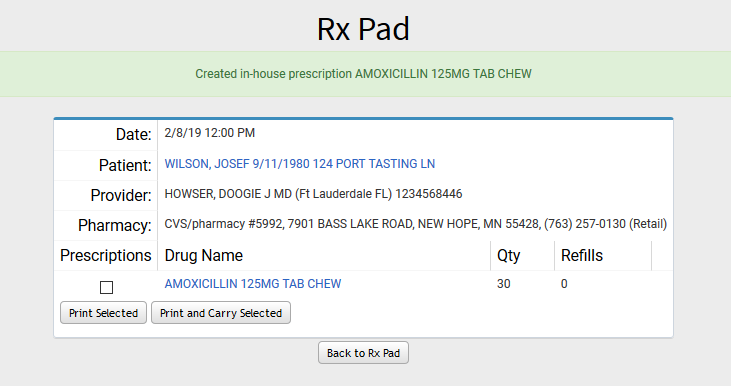
3. Write E-prescription
The Rx Pad is used to write new E-Prescriptions as well as In-House Prescriptions for the selected patient.
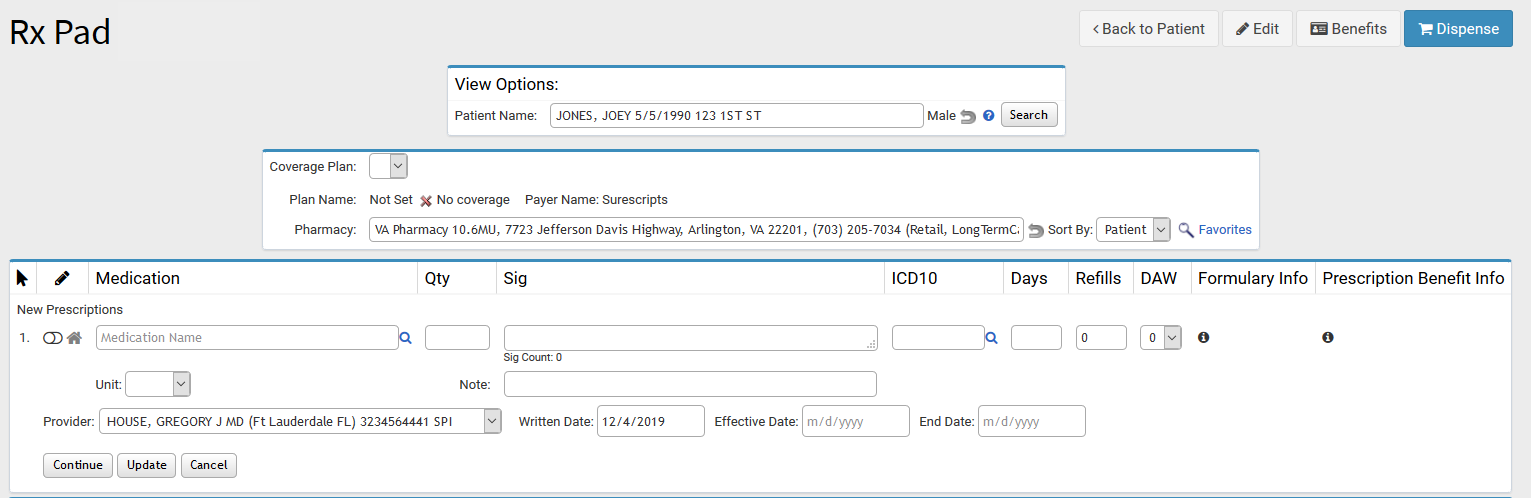
4. Select Pharmacy (not required for in-house prescriptions)
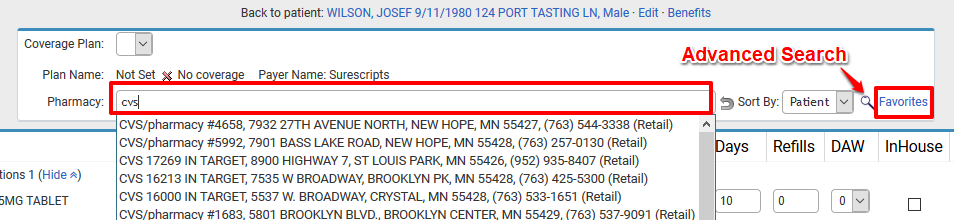
Note:Formulary Info is used to display Real-time Formulary Benefits information obtained from PBMs and Surescripts for patients and Insurances that are supported. Additional details available in an
Advanced E-Prescribing help article.
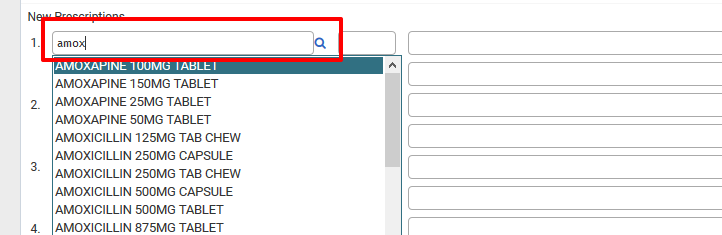
5. Enter Medication and details
You can create new prescriptions based on previous prescriptions, or create new prescriptions.

- When creating a new prescription type the medication name into the field and select from the list, or use the search icon.
- If this will be an in-house dispensed prescription or one that will be printed and given to the patient, select the "In-House" toggle.
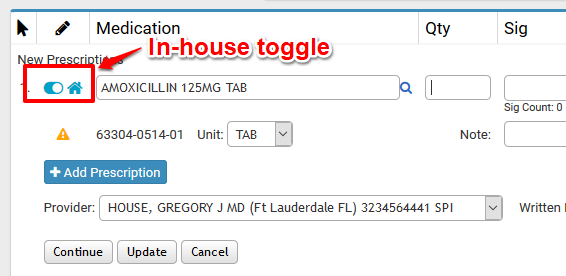
- Enter Medication Qty, Sig, ICD10, Day Supply, Refills, and Dispense as Written information after selecting the medication.
- To add additional Prescriptions, select the "Add Prescription" button to add up to 12 prescriptions at one time.
- Select "Continue" button at bottom when all prescriptions have been entered to go to DUR check and Verification step.
6. Go to Verification Step
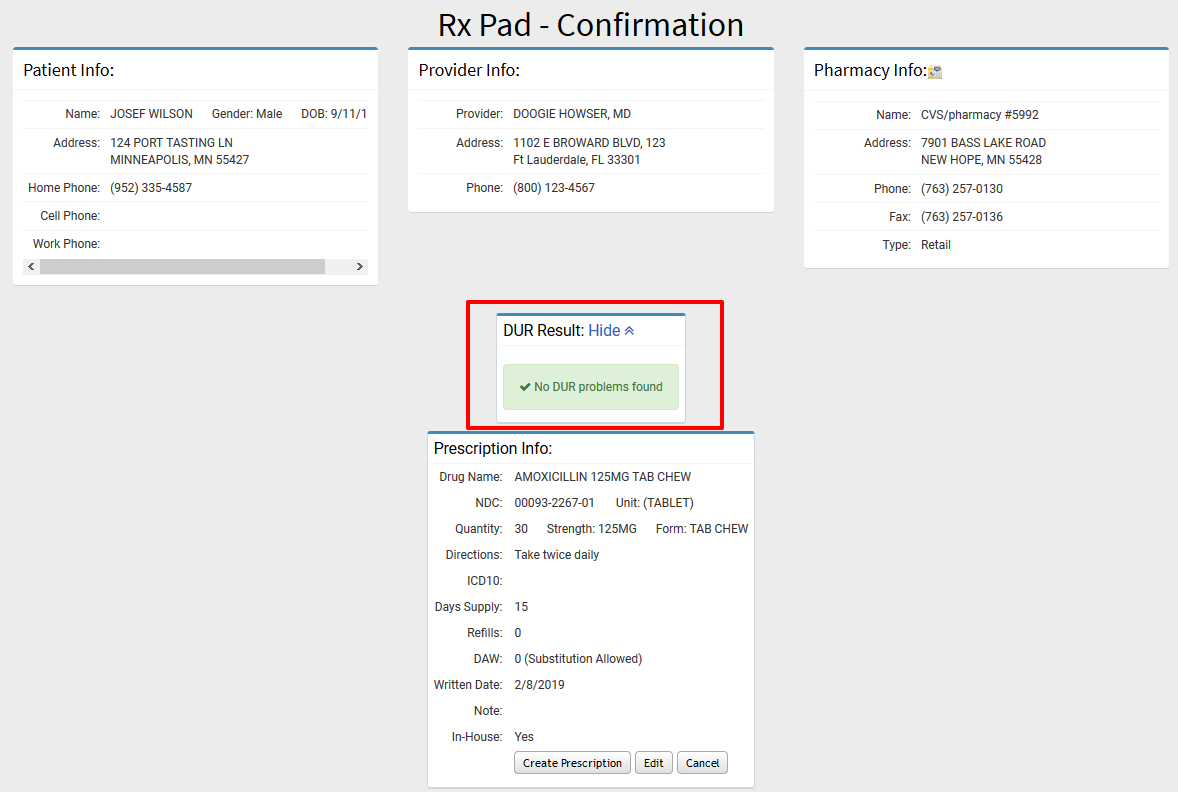
- The confirmation page is where you will be able to verify information for the Prescriptions and review DUR check (if enabled for your site).
7. Transmit or Create Prescriptions
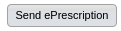
- To transmit the E-Prescription or Create the in-house Prescription, select 'Send ePrescription' or "Create Prescription" on the confirmation page.
- You will see a confirmation page that lists all of the in-house and e-prescriptions created. In-house prescriptions have the option to Print or Print and Carry prescriptions.
Viewing Past E-Prescriptions

From the side bar, select Patients -> EPrescriptions, then select a date range.
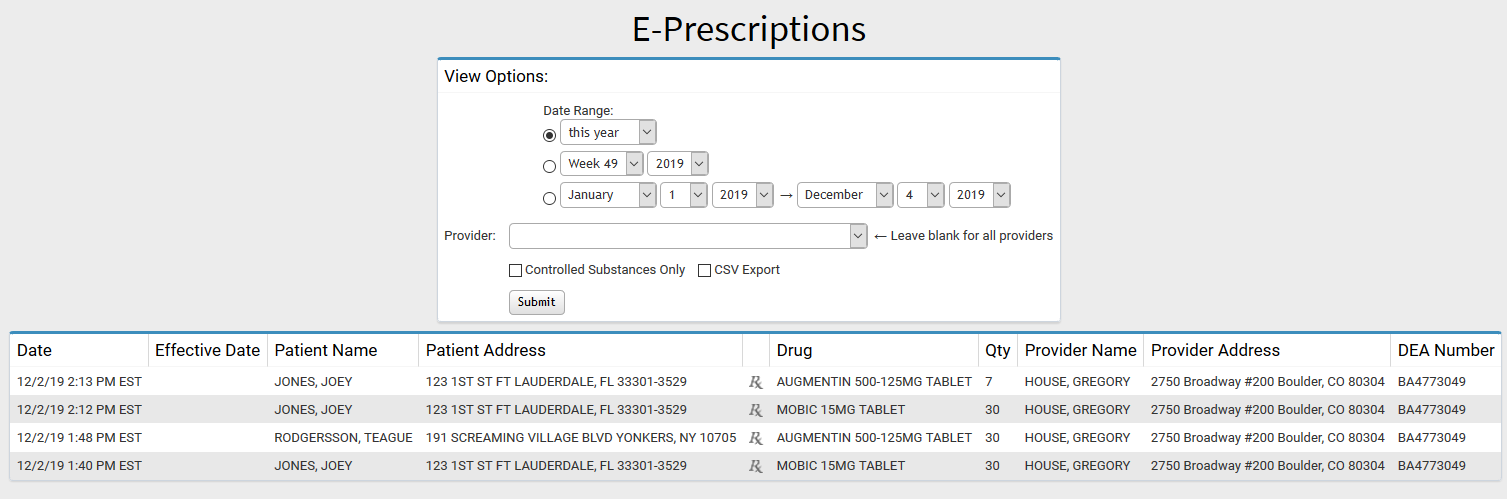
- You will see all E-Prescriptions within that range, along with any error messages.
Handling Refill Requests
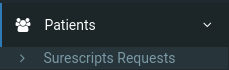
From the side bar, select Patients -> Surescripts Requests
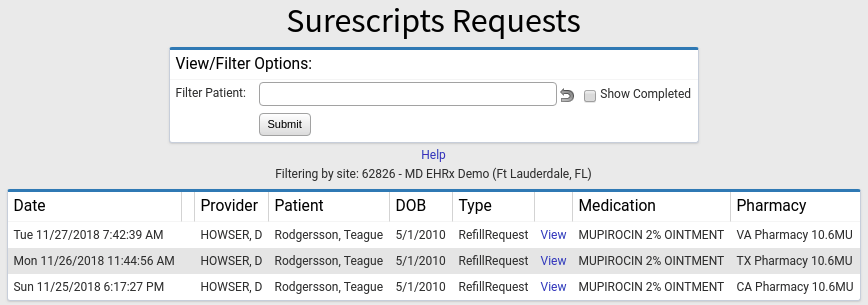
- Select 'View' to view a particular refill request.
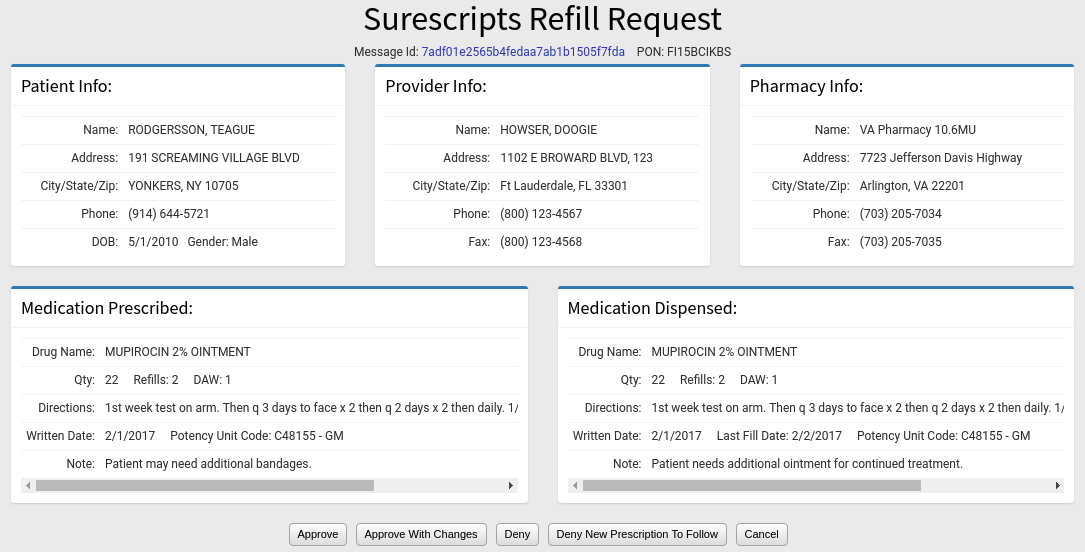
From the Refill Request screen, you have a few options
- Approve
- Approve with Changes
- Deny
- Deny New Prescription To Follow
- Cancel
Persona Trust ID Proofing Process
ID Proofing with Persona Trust
The ID Proofing process is required for all providers who will be transmitting eprescriptions from within MDScripts to outside pharmacies. The process requires a web meeting with a certified authenticator who will verify the provider's identity using a web conference that requires a video chat. The provider will need to provide the following information during the video conference:
- Need device with camera
- 2 Forms of ID (DL / Voter Card / SS / Passport)
- DEA # (if EPCS)
- NPI License
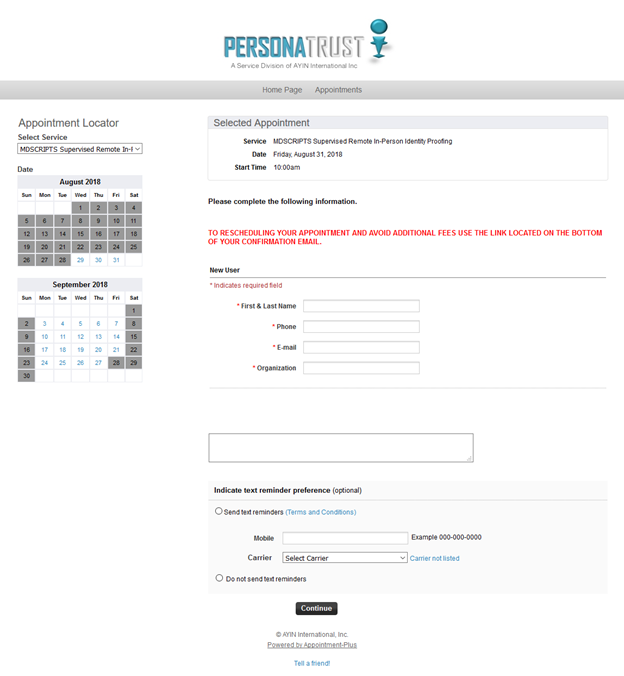
Request an Appointment
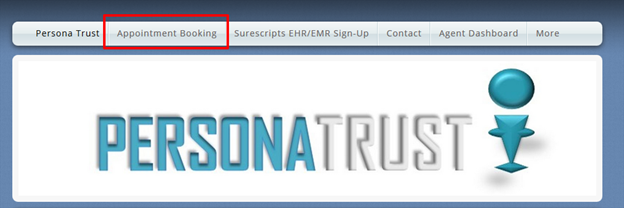
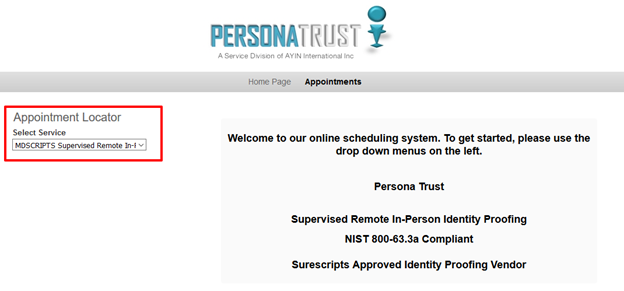
After logging in to MDScripts select Home -> My Settings. There you will find a link to PersonaTrust.net or you can click on the link here.
Once on the Persona Trust website you will select "Appointment Booking"
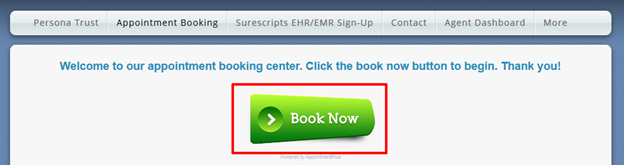
Next, select Book Now
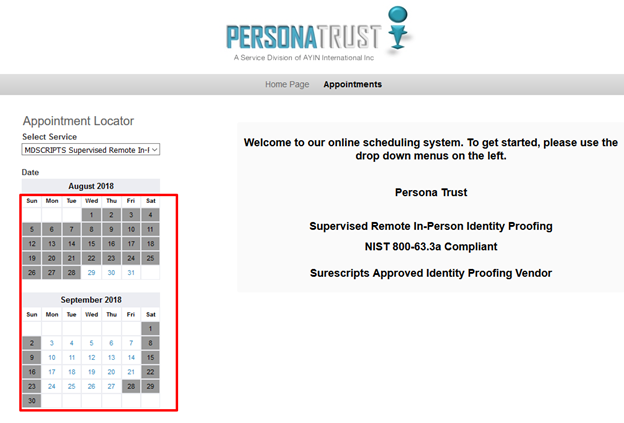
Choose MDSCRIPTS Supervised Remote In-Person Identity Proofing.
Select a Date where you will be available for the conference call
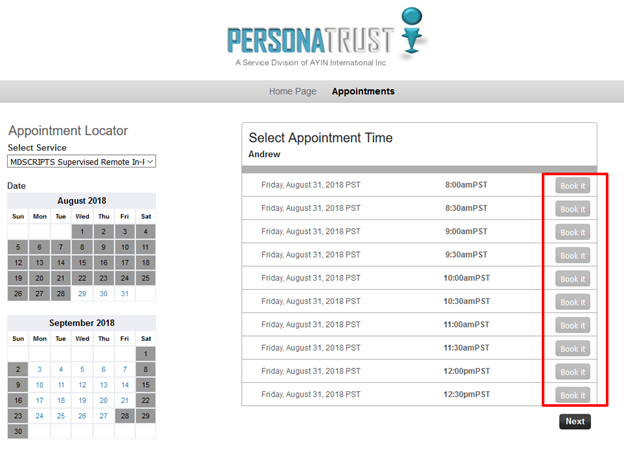
Next select a time when you will be available
Finally complete the registration form with your information so the reviewer can confirm the appointment and send you the required list of documents you will need.